
As we all know, most buildings have some form of windows on them and in this tutorial you will be shown how to make foam look like old time window frames. This page will show how to make a frame and also extra parts of a window that will make it look more realistic and add a bit more depth to the frame.
To make a window frame, you’ll need some EPS foam, a wire brush, acrylic paint and a scalpel knife. Cut 4 smaller rectangles out of a bigger one. Then cut 4 thinner rectangles, 2 longer than the others. Brush over them all with the wire brush. Now paint it the colours you want.
For an accurate proportion to a D&D character, the length of the window would be 18mm and the width would be 9mm. Depending on the size of your model, the windows would obviously have to be proportionate to that.
Anatomy Of A Window
Just to make it easier for you to know what I’m on about, I’ll be including some of the technical terms for some of the parts that I will be showing you how to make. For the main part of the window (the bit where the actual windows would be), I will just be referring to that as the frame. For the top part, that is called the head. The vertical parts are called the jambs and the bottom part of it is called the sill.
Step 1
Gather the tools you will need and the ones I am using are shown below:
- EPS foam
- Scalpel knife
- Cutting mat
- Acrylic paint (black, white and brown)
- Paintbrush
- Wire brush
- Glue
- Pen/pencil
- Ruler

Step 2
Take the EPS foam and cut out a rectangle that is the size that you want. I will be using the measurements of 40mm in length and 35mm in width. This will be the base for the frame. Do not cut out the areas where the window panes would be just yet. If you want to you can cut it down so its thinner so it will look more 3D when together.
Then take another piece of foam and cut out 2 smaller and thinner rectangles. For me, the measurements will be 50mm by 5mm. These will be the head and the sill. The 2 last pieces of foam that need to be cut will be 40mm by 4mm and these will end up being the jambs.

Step 3
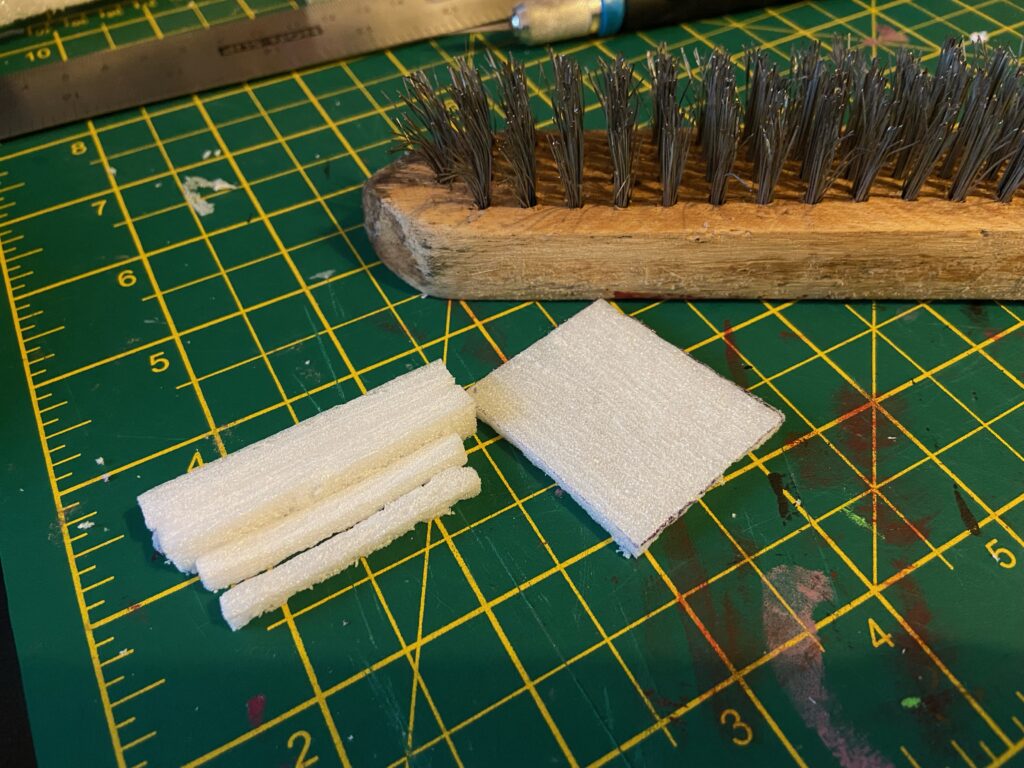
What you will want to do next, is to run the wire brush over all of the foam pieces. For the pieces that aren’t the frame, do this on all sides as all of them will be showing. For the frame itself, just do this on the front and back.
You can go over these with varying pressure as the harder you press, more grooves will be created and the overall woodgrain effect will look better. Just be careful not too press too hard, because depending on how thick your foam is, you might end up accidentally breaking it.
Step 4
Now once that is done, you can cut out the holes where the window panes will go, I told you not to do this earlier as it will make it harder for the wire brush to not break it as it would be a lot easier to break and would be more flimsy.
After this is done, you can glue the head and sill to the jambs to form an outline that will go around the frame. Then you can glue the frame in the middle of this foam outline you have made. Make sure that the frame is not lined up with the front of the rest of them because that would just lead to the window looking flat and unrealistic.

Step 5
Start by painting all of it black. This will bring out the shadows and make it look better. While you are waiting for that to dry, mix up the brown colour that you want. I will be using a light brown, but you can use whatever shade you like for this part. You will then want to get another shade of brown that is lighter than what you have already. These will both be used for dry brushing.
Once the black paint is fully dry, start dry brushing on the darker shade of brown you mixed, however put more paint on the brush than you normally would when dry brushing. This just helps to get a bit more coverage with the brown colour without completely blocking out the black that you have already done. When that is dry, take the lighter colour and start properly dry brushing the foam. This will just help bring out the highlights and will make the piece look better.


Window Panes
I am not going to be writing a lot about window panes here as that is not what this specific guide is for, but one example on how you could make some ‘glass’ panes would just be some thin, see through plastic. Like the slightly thicker plastic you would find at the bottom of a plastic box that holds fruit. If you cut a rectangle out of that, you could glue it onto the back of the frame and that would give the illusion of there being glass in the window. That would just be to finish off the overall look of the window